Argo cd 安装和部署
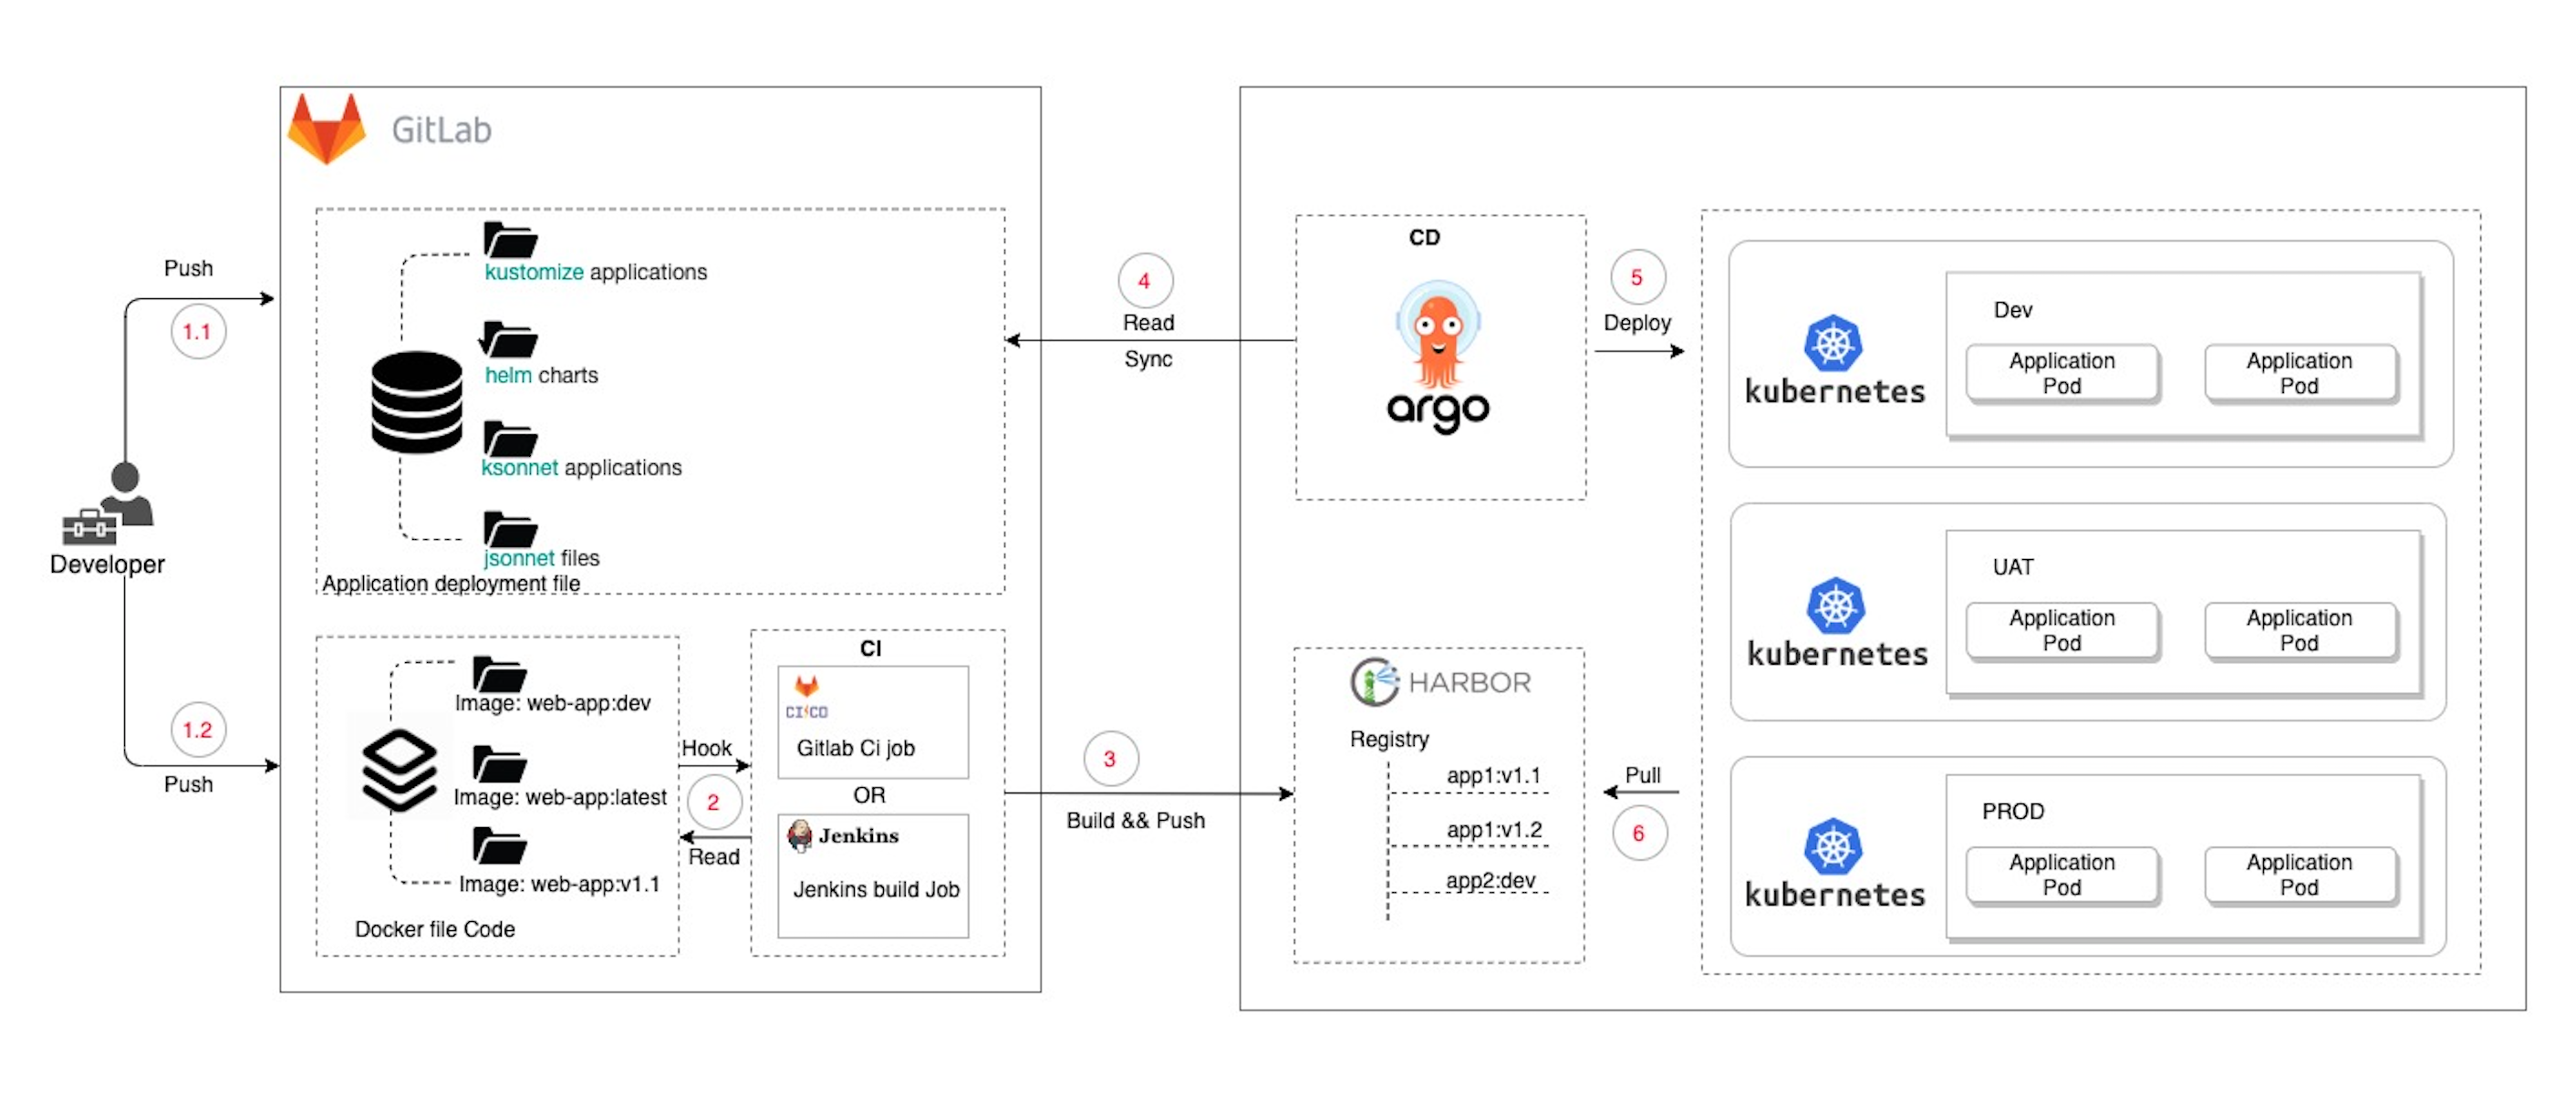
Argo CD 是一个为 Kubernetes 而生的,遵循声明式 GitOps 理念的持续部署(CD)工具。Argo CD 可在 Git 存储库更改时自动同步和部署应用程序
安装
前提:你已经安装好了 k8s 环境,我们将在国内的k8s环境下部署argocd
1k3s kubectl create namespace argocd
2kubectl apply -n argocd -f https://github.jobcher.com/gh/https://raw.githubusercontent.com/argoproj/argo-cd/stable/manifests/install.yaml
检查是否正常部署
1kubectl get po -n argocd

如果没有错误的情况下应该是全部都runnning,但是如果出现argocd-repo-server CrashLoopBackOff错误有以下解决途径:
- 使用以下补丁修补了部署。删除后,错误消失,repo 服务器可以启动。
 1apiVersion: apps/v1
 2kind: Deployment
 3metadata:
 4  name: argocd-repo-server
 5spec:
 6  template:
 7    spec:
 8      securityContext:
 9        seccompProfile:
10          type: RuntimeDefault
如果出现argocd-dex-server imagepullbackoff错误有以下解决方法:
1docker pull ghcr.io/dexidp/dex:v2.37.0
2docker tag ghcr.io/dexidp/dex:v2.37.0 harbor/dexidp/dex:v2.37.0
3docker push harbor/dexidp/adex:v2.37.0
使用自定义镜像
安装 Argo CD CLI
Argo CD CLI 是用于管理 Argo CD 的命令行工具,Mac 系统可以直接使用 brew install 进行安装
1brew install argocd
发布 Argo CD 服务
默认情况下, Argo CD 服务不对外暴露服务,可以通过 LoadBalancer 或者 NodePort 类型的 Service、Ingress、Kubectl 端口转发等方式将 Argo CD 服务发布到 Kubernetes 集群外部。
通过 NodePort 服务的方式暴露 Argo CD 到集群外部
1kubectl patch svc argocd-server -n argocd -p '{"spec": {"type": "NodePort"}}'
获取端口号
1kubectl get svc -n argocd
使用
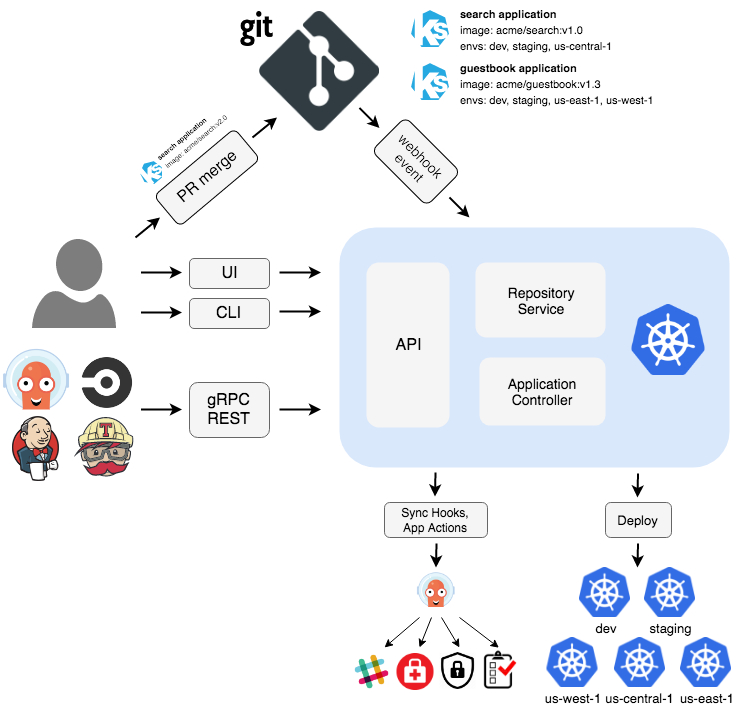
获取 Argo CD 密码
默认情况下 admin
帐号的初始密码是自动生成的,会以明文的形式存储在 Argo CD 安装的命名空间中argocd-initial-admin-secret 的 Secret 对象下的 password
1kubectl -n argocd get secret \
2argocd-initial-admin-secret \
3-o jsonpath="{.data.password}" | base64 -d
命令行可以使用以下方式登录
argocd login <节点 IP>:<端口>
进入UI界面配置
输入地址: 例如:https://10.10.1.1:31751,输入用户名admin和密码
因为我是私有化仓库部署所以要配置私有化gitlab仓库
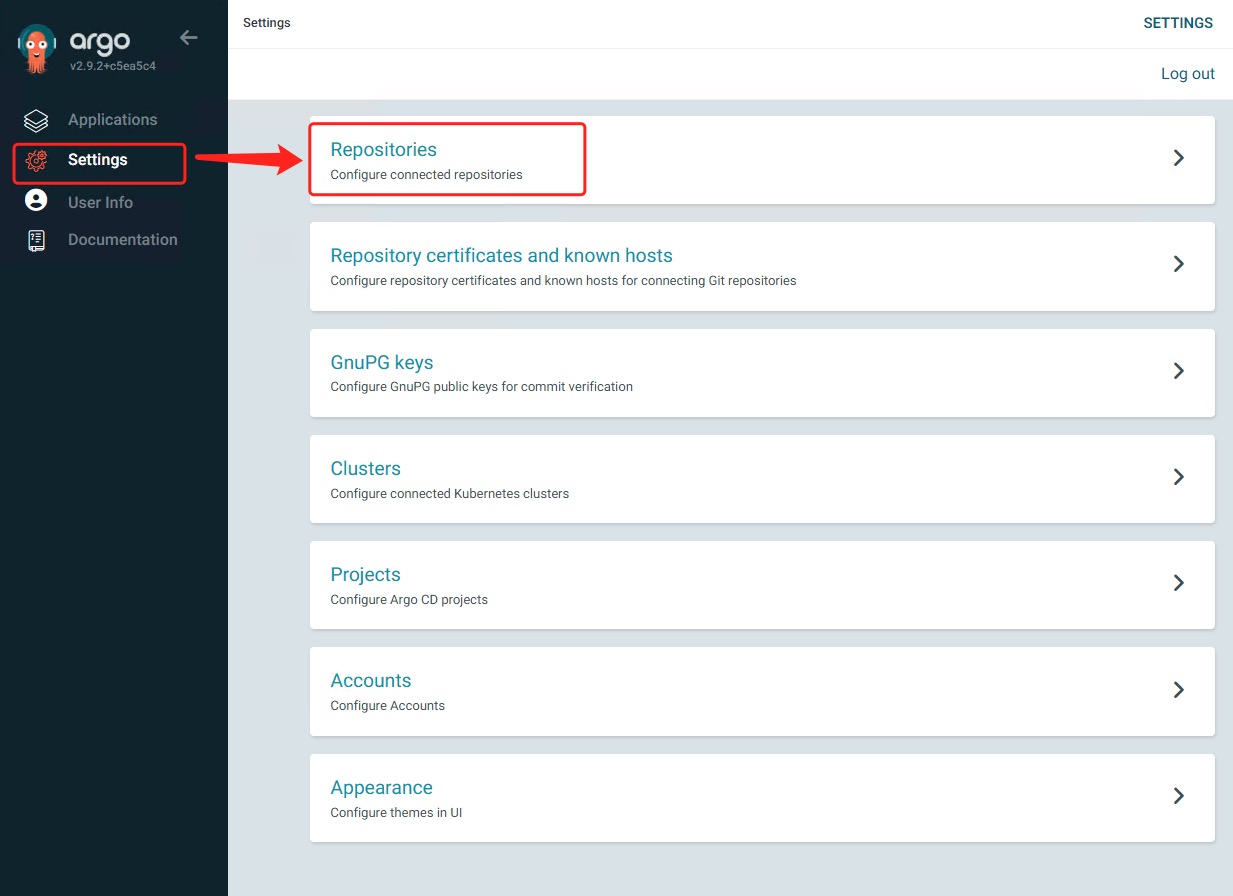
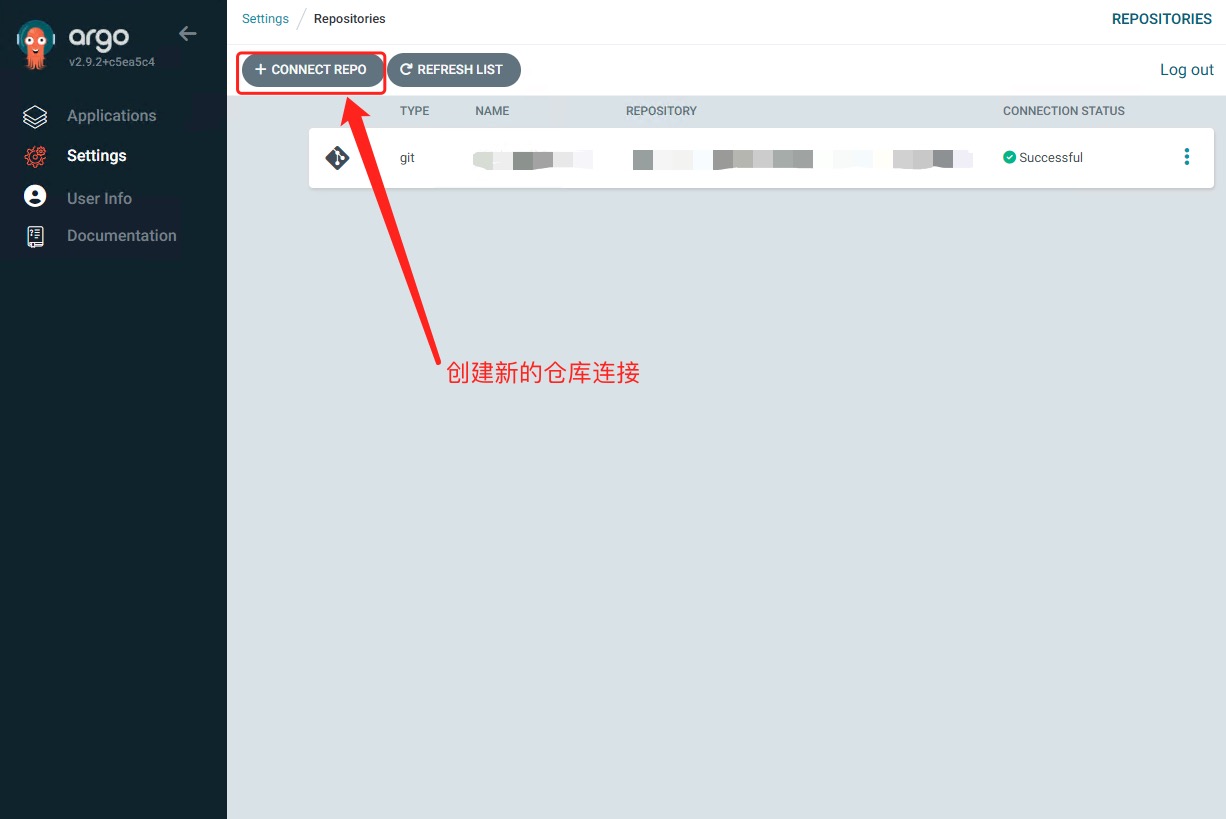
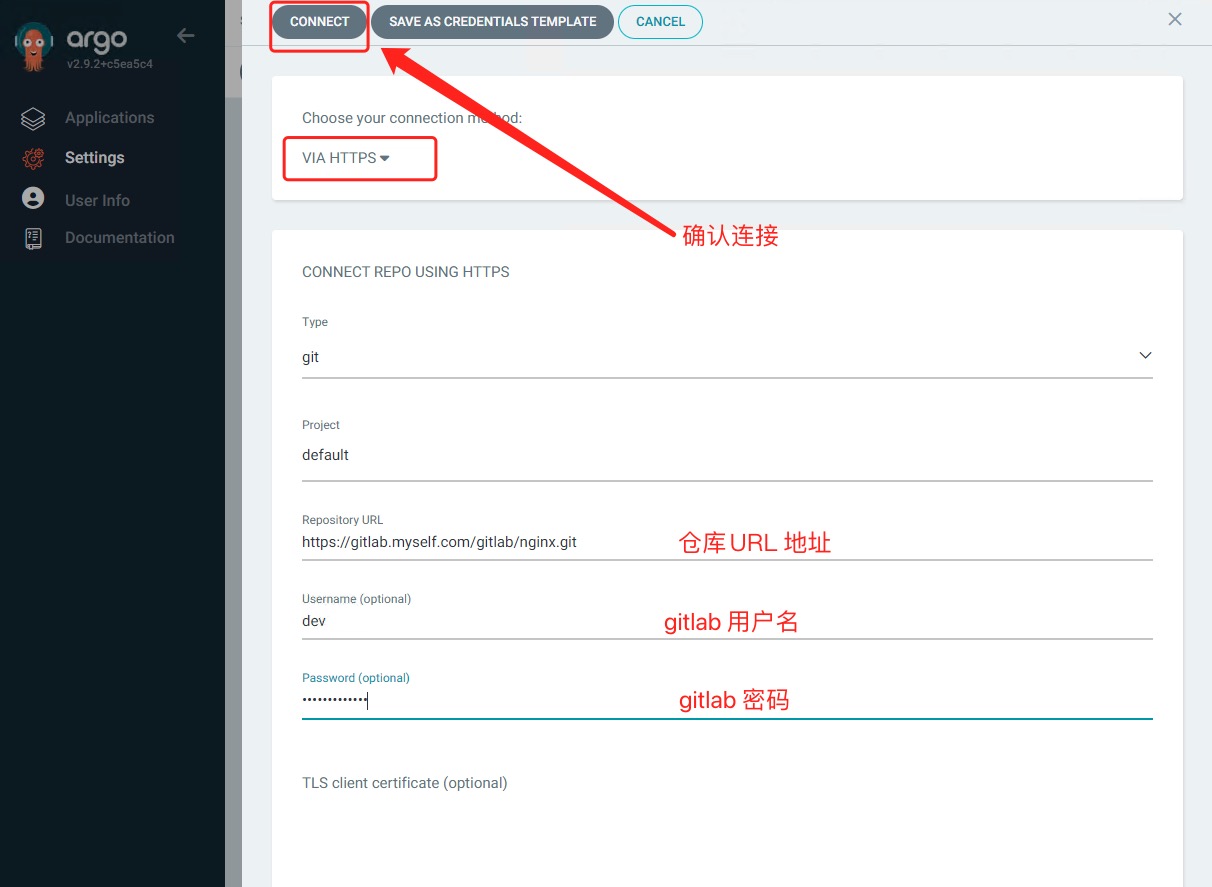
部署服务
创建yaml文件
我提前在代码仓库写好了nginx的yaml文件deployment.yaml
 1apiVersion: apps/v1	#与k8s集群版本有关,使用 kubectl api-versions 即可查看当前集群支持的版本
 2kind: Deployment	#该配置的类型,我们使用的是 Deployment
 3metadata:	        #译名为元数据,即 Deployment 的一些基本属性和信息
 4  name: nginx-deployment	#Deployment 的名称
 5  labels:	    #标签,可以灵活定位一个或多个资源,其中key和value均可自定义,可以定义多组,目前不需要理解
 6    app: nginx	#为该Deployment设置key为app,value为nginx的标签
 7spec:	        #这是关于该Deployment的描述,可以理解为你期待该Deployment在k8s中如何使用
 8  replicas: 1	#使用该Deployment创建一个应用程序实例
 9  selector:	    #标签选择器,与上面的标签共同作用,目前不需要理解
10    matchLabels: #选择包含标签app:nginx的资源
11      app: nginx
12  template:	    #这是选择或创建的Pod的模板
13    metadata:	#Pod的元数据
14      labels:	#Pod的标签,上面的selector即选择包含标签app:nginx的Pod
15        app: nginx
16    spec:	    #期望Pod实现的功能(即在pod中部署)
17      containers:	#生成container,与docker中的container是同一种
18      - name: nginx	#container的名称
19        image: nginx:1.7.9	#使用镜像nginx:1.7.9创建container,该container默认80访问
20        livenessProbe: # 存活探针检测
21          httpGet:
22            path: /nginx_status
23            port: 80
24            scheme: HTTP
25          timeoutSeconds: 1
26          periodSeconds: 10
27          successThreshold: 1
28          failureThreshold: 3
29        readinessProbe: # 就绪探针检测
30          httpGet:
31            path: /nginx_status
32            port: 80
33            scheme: HTTP
34          timeoutSeconds: 1
35          periodSeconds: 10
36          successThreshold: 1
37          failureThreshold: 3
38        startupProbe: # 启动探针检测
39          httpGet:
40            path: /nginx_status
41            port: 80
42            scheme: HTTP
43          timeoutSeconds: 1
44          periodSeconds: 10
45          successThreshold: 1
46          failureThreshold: 3
svc.yaml
 1apiVersion: v1
 2kind: Service
 3metadata:
 4  name: nginx-service	#Service 的名称
 5  labels:     	#Service 自己的标签
 6    app: nginx	#为该 Service 设置 key 为 app,value 为 nginx 的标签
 7spec:	    #这是关于该 Service 的定义,描述了 Service 如何选择 Pod,如何被访问
 8  selector:	    #标签选择器
 9    app: nginx	#选择包含标签 app:nginx 的 Pod
10  ports:
11  - name: nginx-port	#端口的名字
12    protocol: TCP	    #协议类型 TCP/UDP
13    port: 80	        #集群内的其他容器组可通过 80 端口访问 Service
14    nodePort: 32600   #通过任意节点的 32600 端口访问 Service
15    targetPort: 80	#将请求转发到匹配 Pod 的 80 端口
16  type: NodePort	#Serive的类型,ClusterIP/NodePort/LoaderBalancer
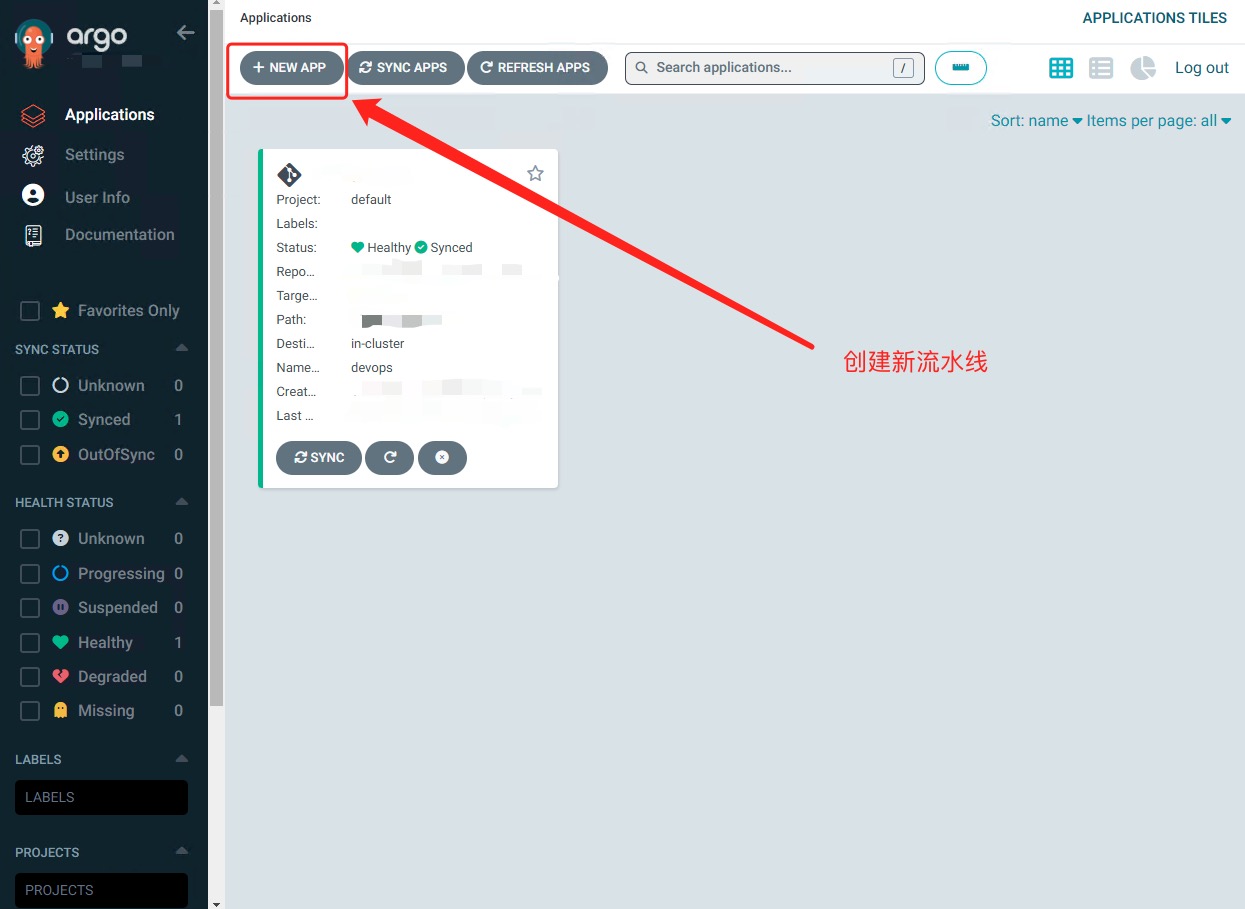
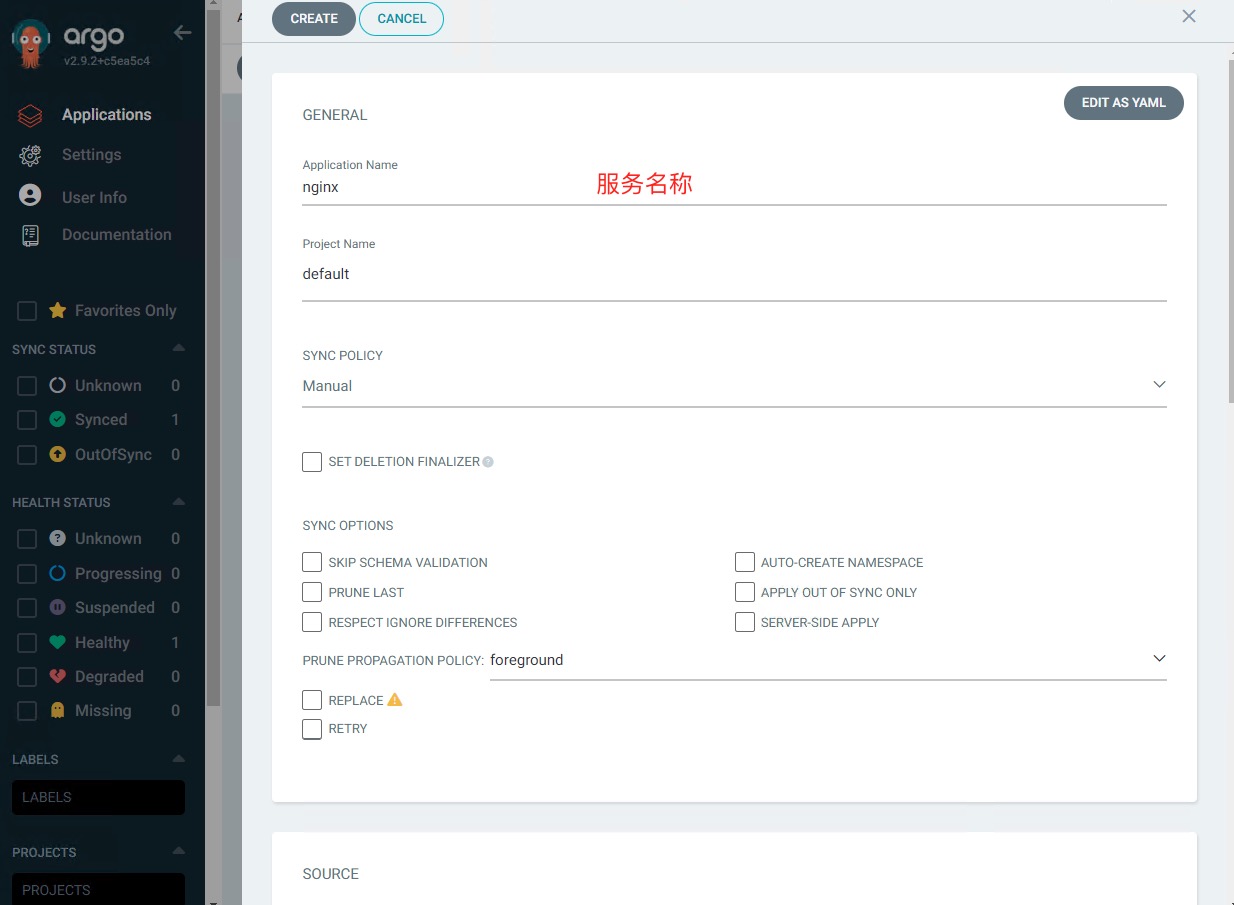
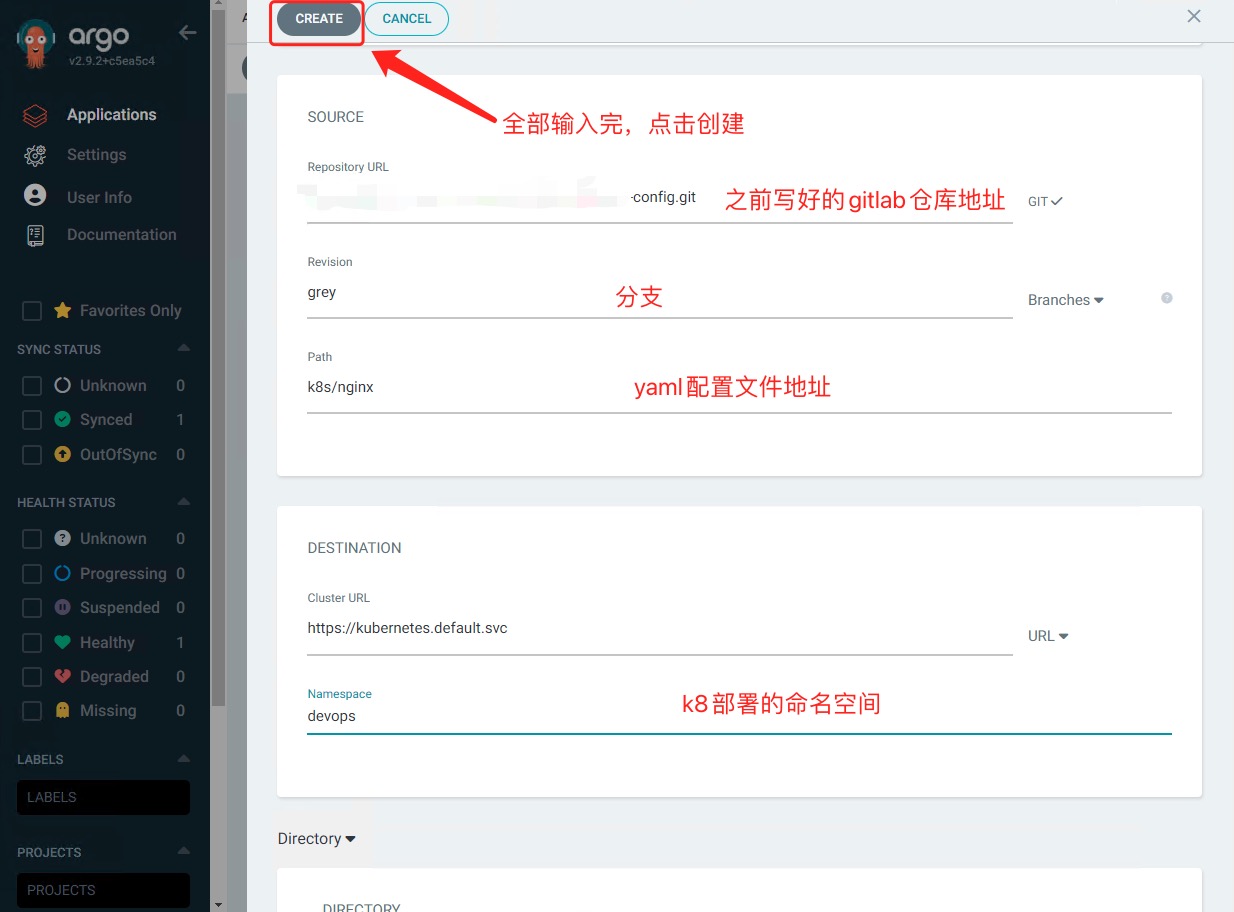
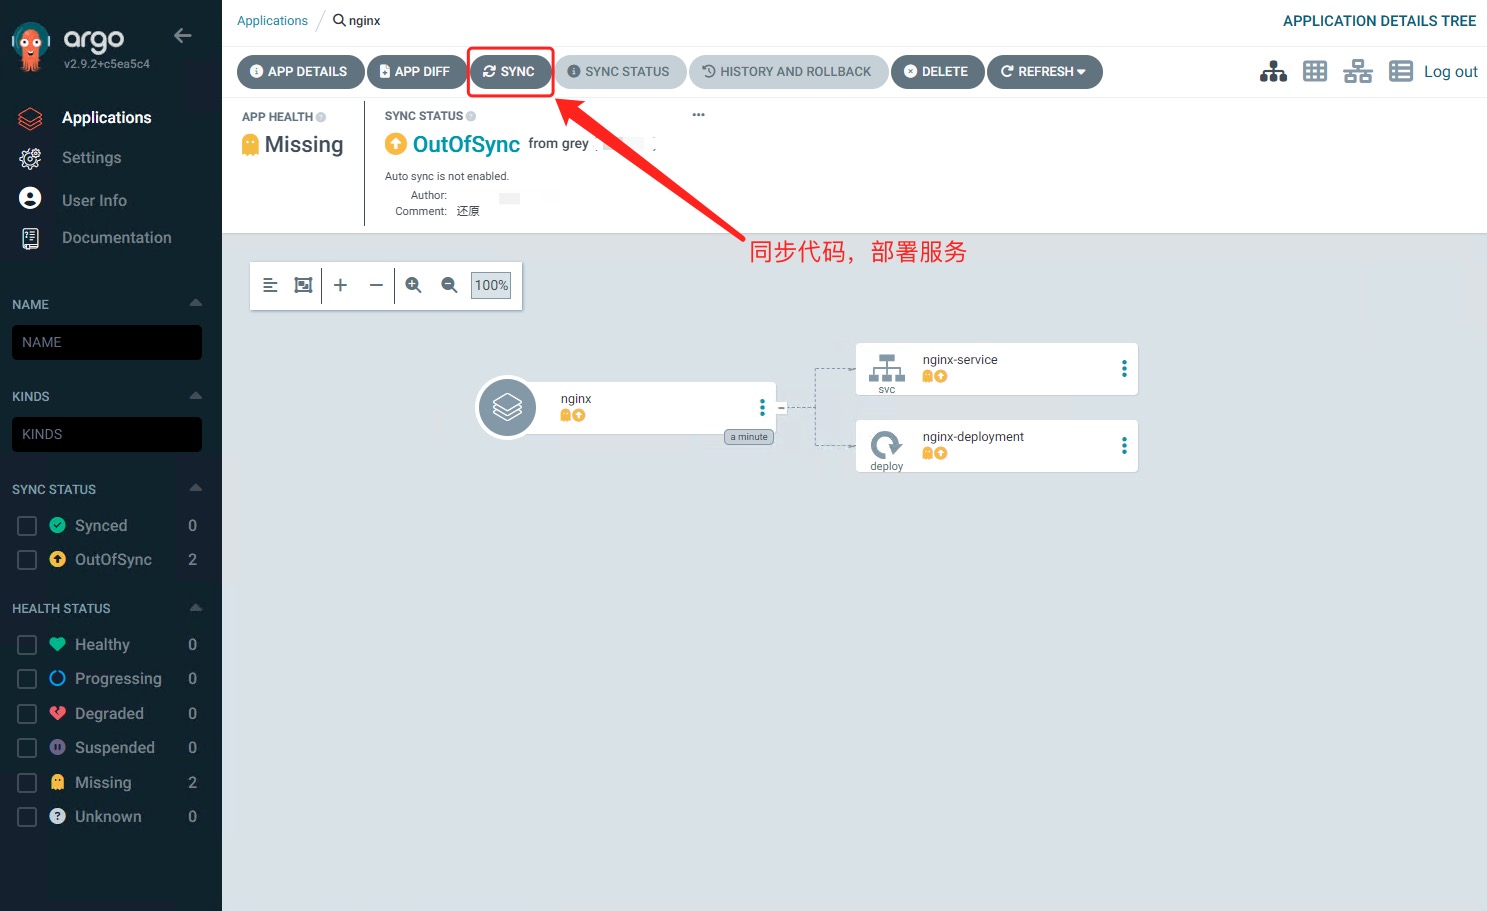
创建app
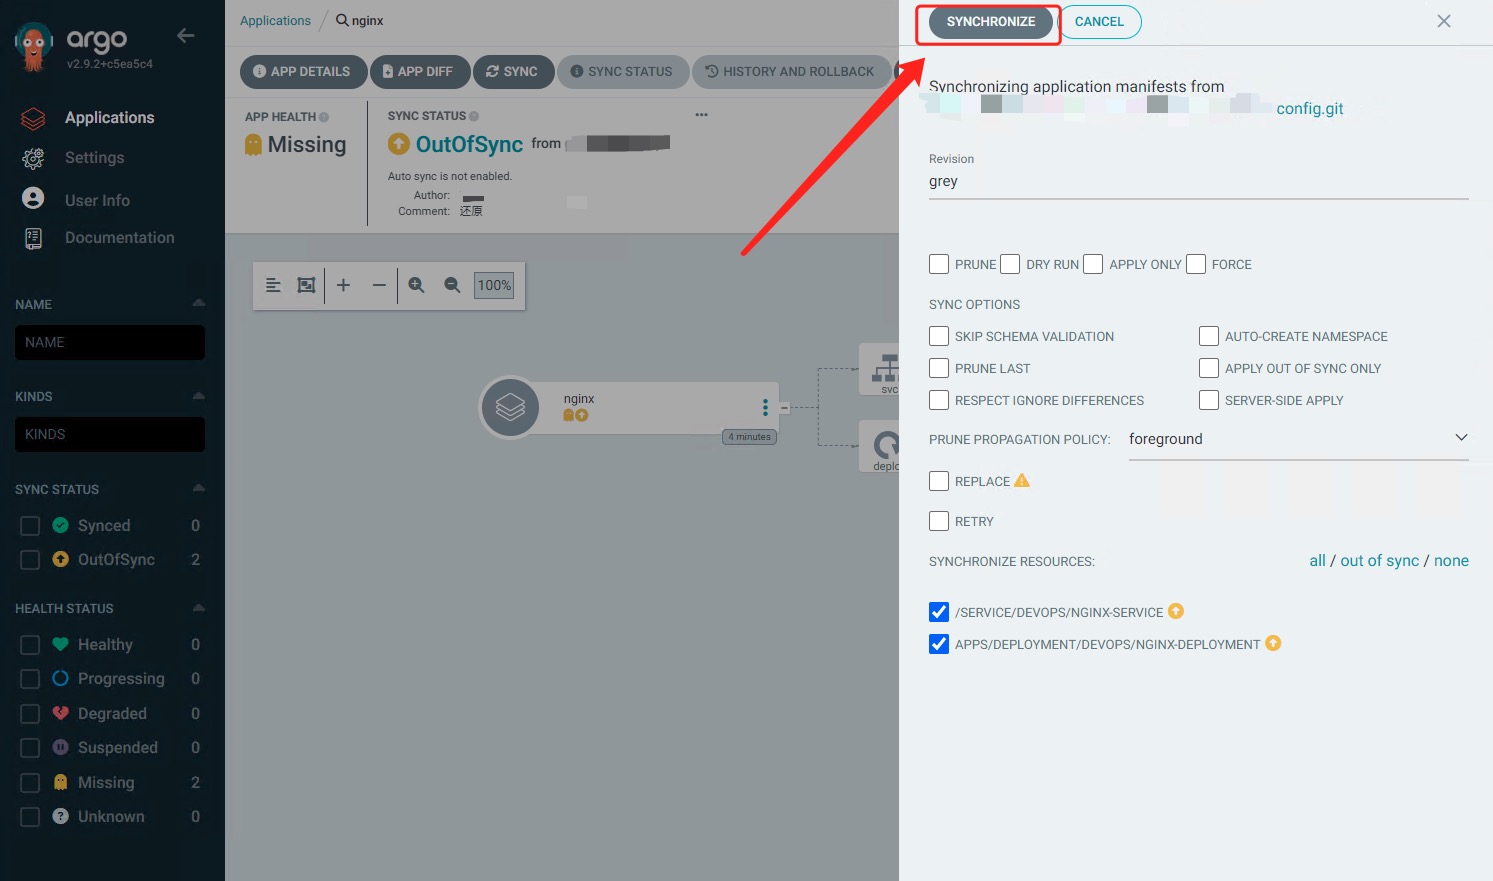
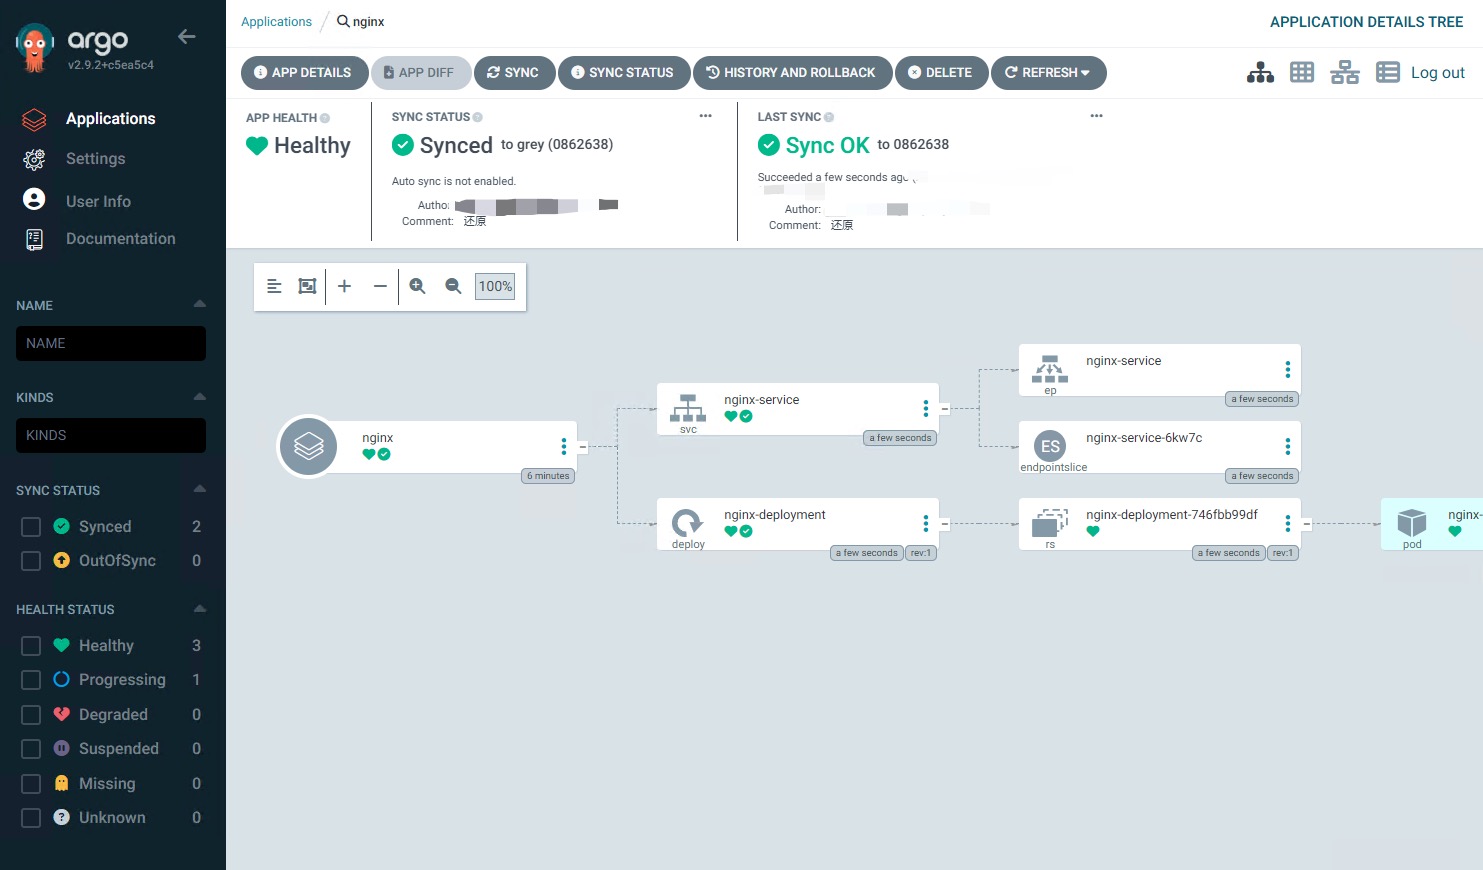
部署成功
